Spring中Aop的配置方式
Spring中Aop的配置方式
准备 🔗
一个 Spring 的 java 项目。
AOP 术语 🔗
几个重要AOP的术语
- 通知(
Advice) - 连接点(
JoinPoint) - 切入点(
Pointcut) - 切面(
Aspect) - 目标(
target)
通知(Advice) 🔗
需要织入的一段逻辑代码。
比如我们需要检查某个函数的参数是否合法。
就需要在方法体之前织入一段逻辑来判断参数。
这段逻辑一般为一个函数。
这个函数就叫做通知。
连接点(JoinPoint) 🔗
连接点的意思是允许我们在哪些地方可以织入一段逻辑。
在Spring中,可以织入的方式有5种。
Before- 前置通知(方法前)After- 后置通知(方法后)Around- 环绕通知(方法前后)AfterReturning- 返回通知(方法返回值之后)AfterThrowing- 异常通知(方法抛出异常之后)
切入点(Pointcut) 🔗
每个方法都可以有五个连接点。
但是实际上我们可能只需在某些地方织入一段逻辑。
这个织入的连接点就叫做切入点。
即连接点是告诉你哪些地方可以织入。
而切入点是实际需要织入的地方。
切面(Aspect) 🔗
通常为一个类。
里面包括了若干的通知(方法)和对应的切入点。
目标(Target) 🔗
需要被通知的对象。
真正的业务逻辑不会感知到我们的切入。
一切织入都是透明的,不可见的。
AOP 配置 🔗
为了模拟服务。
这里建立三个类来测试。
一个是POJO的Person类。
public class Person {
    private int id;
    private String name;
    // 省略getter和setter方法
}一个是Service的PersonService类来模拟对Person的服务操作。
public class PersonService {
    // 若干的服务
}一个是切面类(Aspect)。
public class Aop {
    // 一些切入点和对应的通知
}XML配置 🔗
这里我们在PersonService里面增加一个方法。
模拟获取一个Person对象。
public class PersonService {
    public Person findPersonById(int id) {
        // 模拟取出一条数据
        Person person = new Person();
        person.setId(id);
        person.setName("lwf");
        System.out.println("查询中...");
        return person;
    }
}我们需要先把切面(Aop)类,服务(PersonService)类。
配置为Bean,让Spring管理它们。
<?xml version="1.0" encoding="UTF-8" ?>
<beans xmlns="http://www.springframework.org/schema/beans"
       xmlns:xsi="http://www.w3.org/2001/XMLSchema-instance"
       xsi:schemaLocation="http://www.springframework.org/schema/beans
                           http://www.springframework.org/schema/beans/spring-beans.xsd">
    <bean id="personService" class="service.PersonService"></bean>
    <bean id="aop" class="aop.Aop"></bean>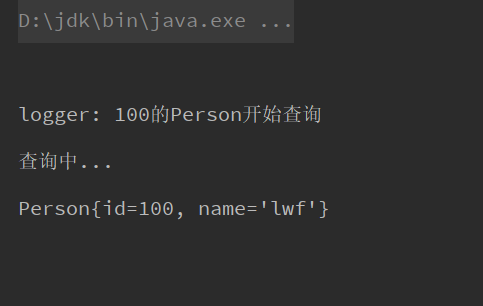
</beans>现在我们想在findPersonById这个服务前打印日志。
输出查询的id。
public class Aop {
    public void before(JoinPoint joinPoint) throws Exception {
        Object[] args = joinPoint.getArgs();
        int id = (int) args[0];
        System.out.println("logger: " + id + "的Person开始查询");
    }
}写完通知之后需要在xml配置这个通知织入findPersonById这个服务。
<?xml version="1.0" encoding="UTF-8" ?>
<beans xmlns="http://www.springframework.org/schema/beans"
       xmlns:xsi="http://www.w3.org/2001/XMLSchema-instance"
       xsi:schemaLocation="http://www.springframework.org/schema/beans
                           http://www.springframework.org/schema/beans/spring-beans.xsd">
    <bean id="personService" class="service.PersonService"></bean>
    <bean id="aop" class="aop.Aop"></bean>

    <!-- aop的配置 -->
    <aop:config>
        <!-- 配置一个切面 -->
        <!-- ref引用一个bean -->
        <aop:aspect ref="aop">
            <!-- 配置一个切点 -->
            <!-- method指定通知 -->
            <!-- pointcut指定目标 -->
            <aop:before method="before"
                        pointcut="execution(public * service.PersonService.findPersonById(int))"></aop:before>
        </aop:aspect>
    </aop:config>
</beans>
写个测试类来测试下:
public class SpringTest {
    @Test
    public void test01() {
        ClassPathXmlApplicationContext applicationContext = new ClassPathXmlApplicationContext("spring.xml");
        PersonService personService = applicationContext.getBean("personService", PersonService.class);
        Person person = personService.findPersonById(100);
        System.out.println(person);
    }
}
运行之后,可以看见确实在方法调用之前织入了日志的通知:
上面配置了前置通知。
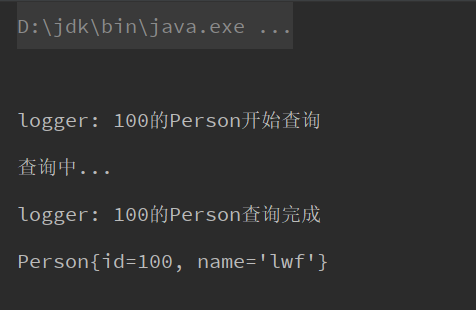
后置通知和前置通知差不多。
只需要改变下参数就行。
<beans xmlns="http://www.springframework.org/schema/beans"
       xmlns:xsi="http://www.w3.org/2001/XMLSchema-instance"
       xsi:schemaLocation="http://www.springframework.org/schema/beans
                           http://www.springframework.org/schema/beans/spring-beans.xsd">
    <bean id="personService" class="service.PersonService"></bean>
    <bean id="aop" class="aop.Aop"></bean>

    <aop:config>
        <aop:aspect ref="aop">
            <!-- 省略其他配置 -->
            <aop:before method="after"
                        pointcut="execution(public * service.PersonService.findPersonById(int))"></aop:before>
        </aop:aspect>
    </aop:config>
</beans>public class Aop {
// 省略其他通知
public void after(JoinPoint joinPoint) {
Object[] args = joinPoint.getArgs();
int id = (int) args[0];
System.out.println("logger: " + id + "的Person查询完成");
}
}运行之前的test01之后可以看到在服务之后织入了逻辑。
现在来配置下afterReturning和afterThrowing。
看名字很容易看出,就是在返回值或者抛出异常之后运行。
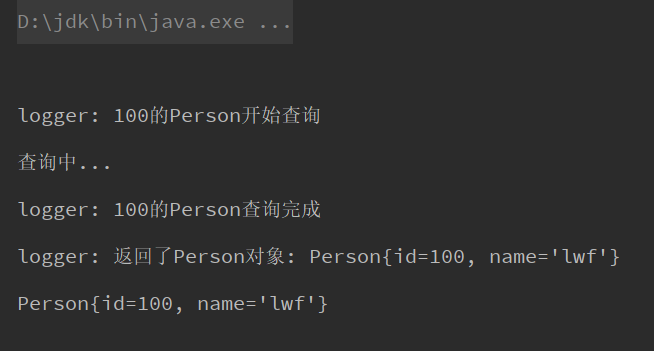
先配置afterReturning。
<beans xmlns="http://www.springframework.org/schema/beans"
       xmlns:xsi="http://www.w3.org/2001/XMLSchema-instance"
       xsi:schemaLocation="http://www.springframework.org/schema/beans
                           http://www.springframework.org/schema/beans/spring-beans.xsd">
    <bean id="personService" class="service.PersonService"></bean>
    <bean id="aop" class="aop.Aop"></bean>

    <aop:config>
        <aop:aspect ref="aop">
            <!-- 省略其他配置 -->
            <!-- returning设置入参的名字,通知的参数名必须和这里的名字一致 -->
            <aop:after-returning method="afterReturning"
                                 pointcut="execution(public * service.PersonService.findPersonById(int))"
                                 returning="person"></aop:after-returning>
        </aop:aspect>
    </aop:config>
</beans>public class Aop {
// 省略其他通知
public void afterReturning(Person person) {
System.out.println("logger: 返回了Person对象: " + person);
}
}运行test01,可以看到织入成功:
再来配置afterThrowing。
<beans xmlns="http://www.springframework.org/schema/beans"
       xmlns:xsi="http://www.w3.org/2001/XMLSchema-instance"
       xsi:schemaLocation="http://www.springframework.org/schema/beans
                           http://www.springframework.org/schema/beans/spring-beans.xsd">
    <bean id="personService" class="service.PersonService"></bean>
    <bean id="aop" class="aop.Aop"></bean>

    <aop:config>
        <aop:aspect ref="aop">
            <!-- 省略其他配置 -->
            <!-- throwing设置异常参数的名字,通知的参数名必须和这里的名字一致 -->
            <aop:after-throwing method="afterThrowing"
                                pointcut="execution(public * service.PersonService.findPersonById(int))"
                                throwing="ex"></aop:after-throwing>
        </aop:aspect>
    </aop:config>
</beans>public class Aop {
// 省略其他通知
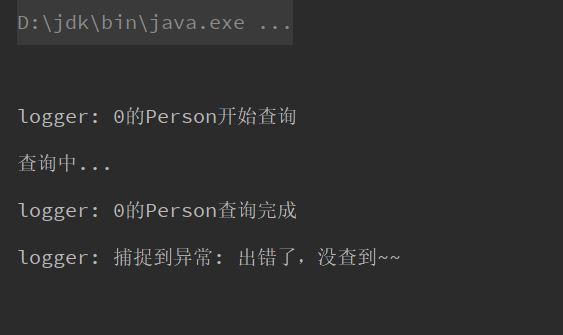
public void afterThrowing(Exception ex) {
System.out.println("logger: 捕捉到异常: " + ex.getMessage());
}
}为了查看异常通知的效果。
我们在findPersonById模拟。
如果id为0就抛出一个异常。
public class PersonService {
    public Person findPersonById(int id) {
        // 模拟取出一条数据
        Person person = new Person();
        person.setId(id);
        person.setName("lwf");
        System.out.println("查询中...");
        if (id == 0) {
            throw new Exception("出错了,没查到~~");
        }
        return person;
    }
}然后我们修改下test01
public class SpringTest {
    @Test
    public void test01() {
        ClassPathXmlApplicationContext applicationContext = new ClassPathXmlApplicationContext("spring.xml");
        PersonService personService = applicationContext.getBean("personService", PersonService.class);
        try {
            Person person = personService.findPersonById(0);
            System.out.println(person);
        } catch (Exception e) {
        }
    }
}
运行之后可以看到确实捕获到了异常
接下来是环绕通知的配置。
环绕通知的配置和其他的有所不同。
<beans xmlns="http://www.springframework.org/schema/beans"
       xmlns:xsi="http://www.w3.org/2001/XMLSchema-instance"
       xsi:schemaLocation="http://www.springframework.org/schema/beans
                           http://www.springframework.org/schema/beans/spring-beans.xsd">
    <bean id="personService" class="service.PersonService"></bean>
    <bean id="aop" class="aop.Aop"></bean>

    <aop:config>
        <aop:aspect ref="aop">
            <!-- 省略其他配置 -->
            <aop:around method="around"
                        pointcut="execution(public * service.PersonService.findPersonById(int))"></aop:around>
        </aop:aspect>
    </aop:config>
</beans>public class Aop {
// 省略其他通知
public Object around(ProceedingJoinPoint joinPoint) throws Throwable {
System.out.println("logger: 环绕通知的前置");
// 这里调用真正的逻辑处理
// 在这前面,在这之后都可以织入的逻辑
Object proceed = joinPoint.proceed();
System.out.println("logger: 环绕通知的后置");
// 一定要返回proceed()函数返回的值
// 因为生成的对象是代理对象,这样代理对象才能拿到值
return proceed;
}
}运行test01
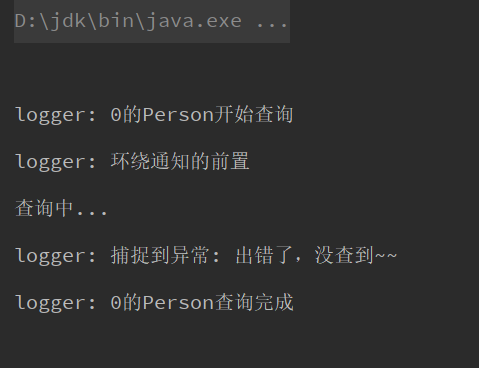
发现环绕的后置没有执行。
原因是在目标中抛出了异常,函数就终止运行了。
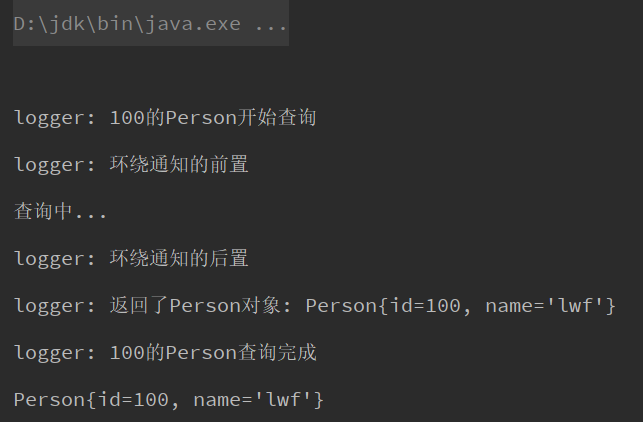
我们可以把id改为大于0的数。
这样子就可以看到效果了:
注解配置 🔗
注解的话其实都差不多:
@Aspect配置切面@Before前置通知@After后置通知@AfterReturning返回通知@AfterThrowing异常通知
先在xml配置开启bean注解和aop注解:
<?xml version="1.0" encoding="UTF-8" ?>
<beans xmlns="http://www.springframework.org/schema/beans"
       xmlns:xsi="http://www.w3.org/2001/XMLSchema-instance"
       xmlns:aop="http://www.springframework.org/schema/aop"
       xmlns:context="http://www.springframework.org/schema/context"
       xsi:schemaLocation="http://www.springframework.org/schema/beans
                           http://www.springframework.org/schema/beans/spring-beans.xsd
                           http://www.springframework.org/schema/context
                           http://www.springframework.org/schema/context/spring-context.xsd
                           http://www.springframework.org/schema/aop
                           http://www.springframework.org/schema/aop/spring-aop.xsd">
    <!-- 配置bean注解 -->
    <context:component-scan base-package="pojo,aop"/>
    <!-- 配置aop注解 -->
    <aop:aspectj-autoproxy/>
</beans>在PersonService上配置@Component。
然后在Aop类上标注相应的注解就可以了。
@Aspect
@Component
public class Aop {
    @Before("execution(public * service.PersonService.findPersonById(int))")
    public void before(JoinPoint joinPoint) {
        Object[] args = joinPoint.getArgs();
        int id = (int) args[0];
        System.out.println("logger: " + id + "的Person开始查询");
    }

    @After("execution(public * service.PersonService.findPersonById(int))")
    public void after(JoinPoint joinPoint) {
        Object[] args = joinPoint.getArgs();
        int id = (int) args[0];
        System.out.println("logger: " + id + "的Person查询完成");
    }

    @Around("execution(public * service.PersonService.findPersonById(int))")
    public Object around(ProceedingJoinPoint joinPoint) throws Throwable {
        System.out.println("logger: 环绕通知的前置");
        Object proceed = joinPoint.proceed();
        System.out.println("logger: 环绕通知的后置");
        return proceed;
    }

    @AfterReturning(
            pointcut = "execution(public * service.PersonService.findPersonById(int))",
            returning = "person"
    )
    public void afterReturning(Person person) {
        System.out.println("logger: 返回了Person对象: " + person);
    }

    @AfterThrowing(
            pointcut = "execution(public * service.PersonService.findPersonById(int))",
            throwing = "ex"
    )
    public void afterThrowing(Exception ex) {
        System.out.println("logger: 捕捉到异常: " + ex.getMessage());
    }
}运行test01的结果和xml配置的一样。
后记 🔗
一个目标也可以织入多个通知。
这时候就可以用@Order注解来配置先后顺序。